Getting Started
Before we get started using the WhatsApp Cloud API, you need to follow these steps to create a business account, a meta app, and get your number registered and display name approved.
Lets start with creating Meta App first.
Create Meta APP
- Go to Meta Developers site and login with your Facebook account
- Click on the Create App button and choose the App type as Business then click Next.
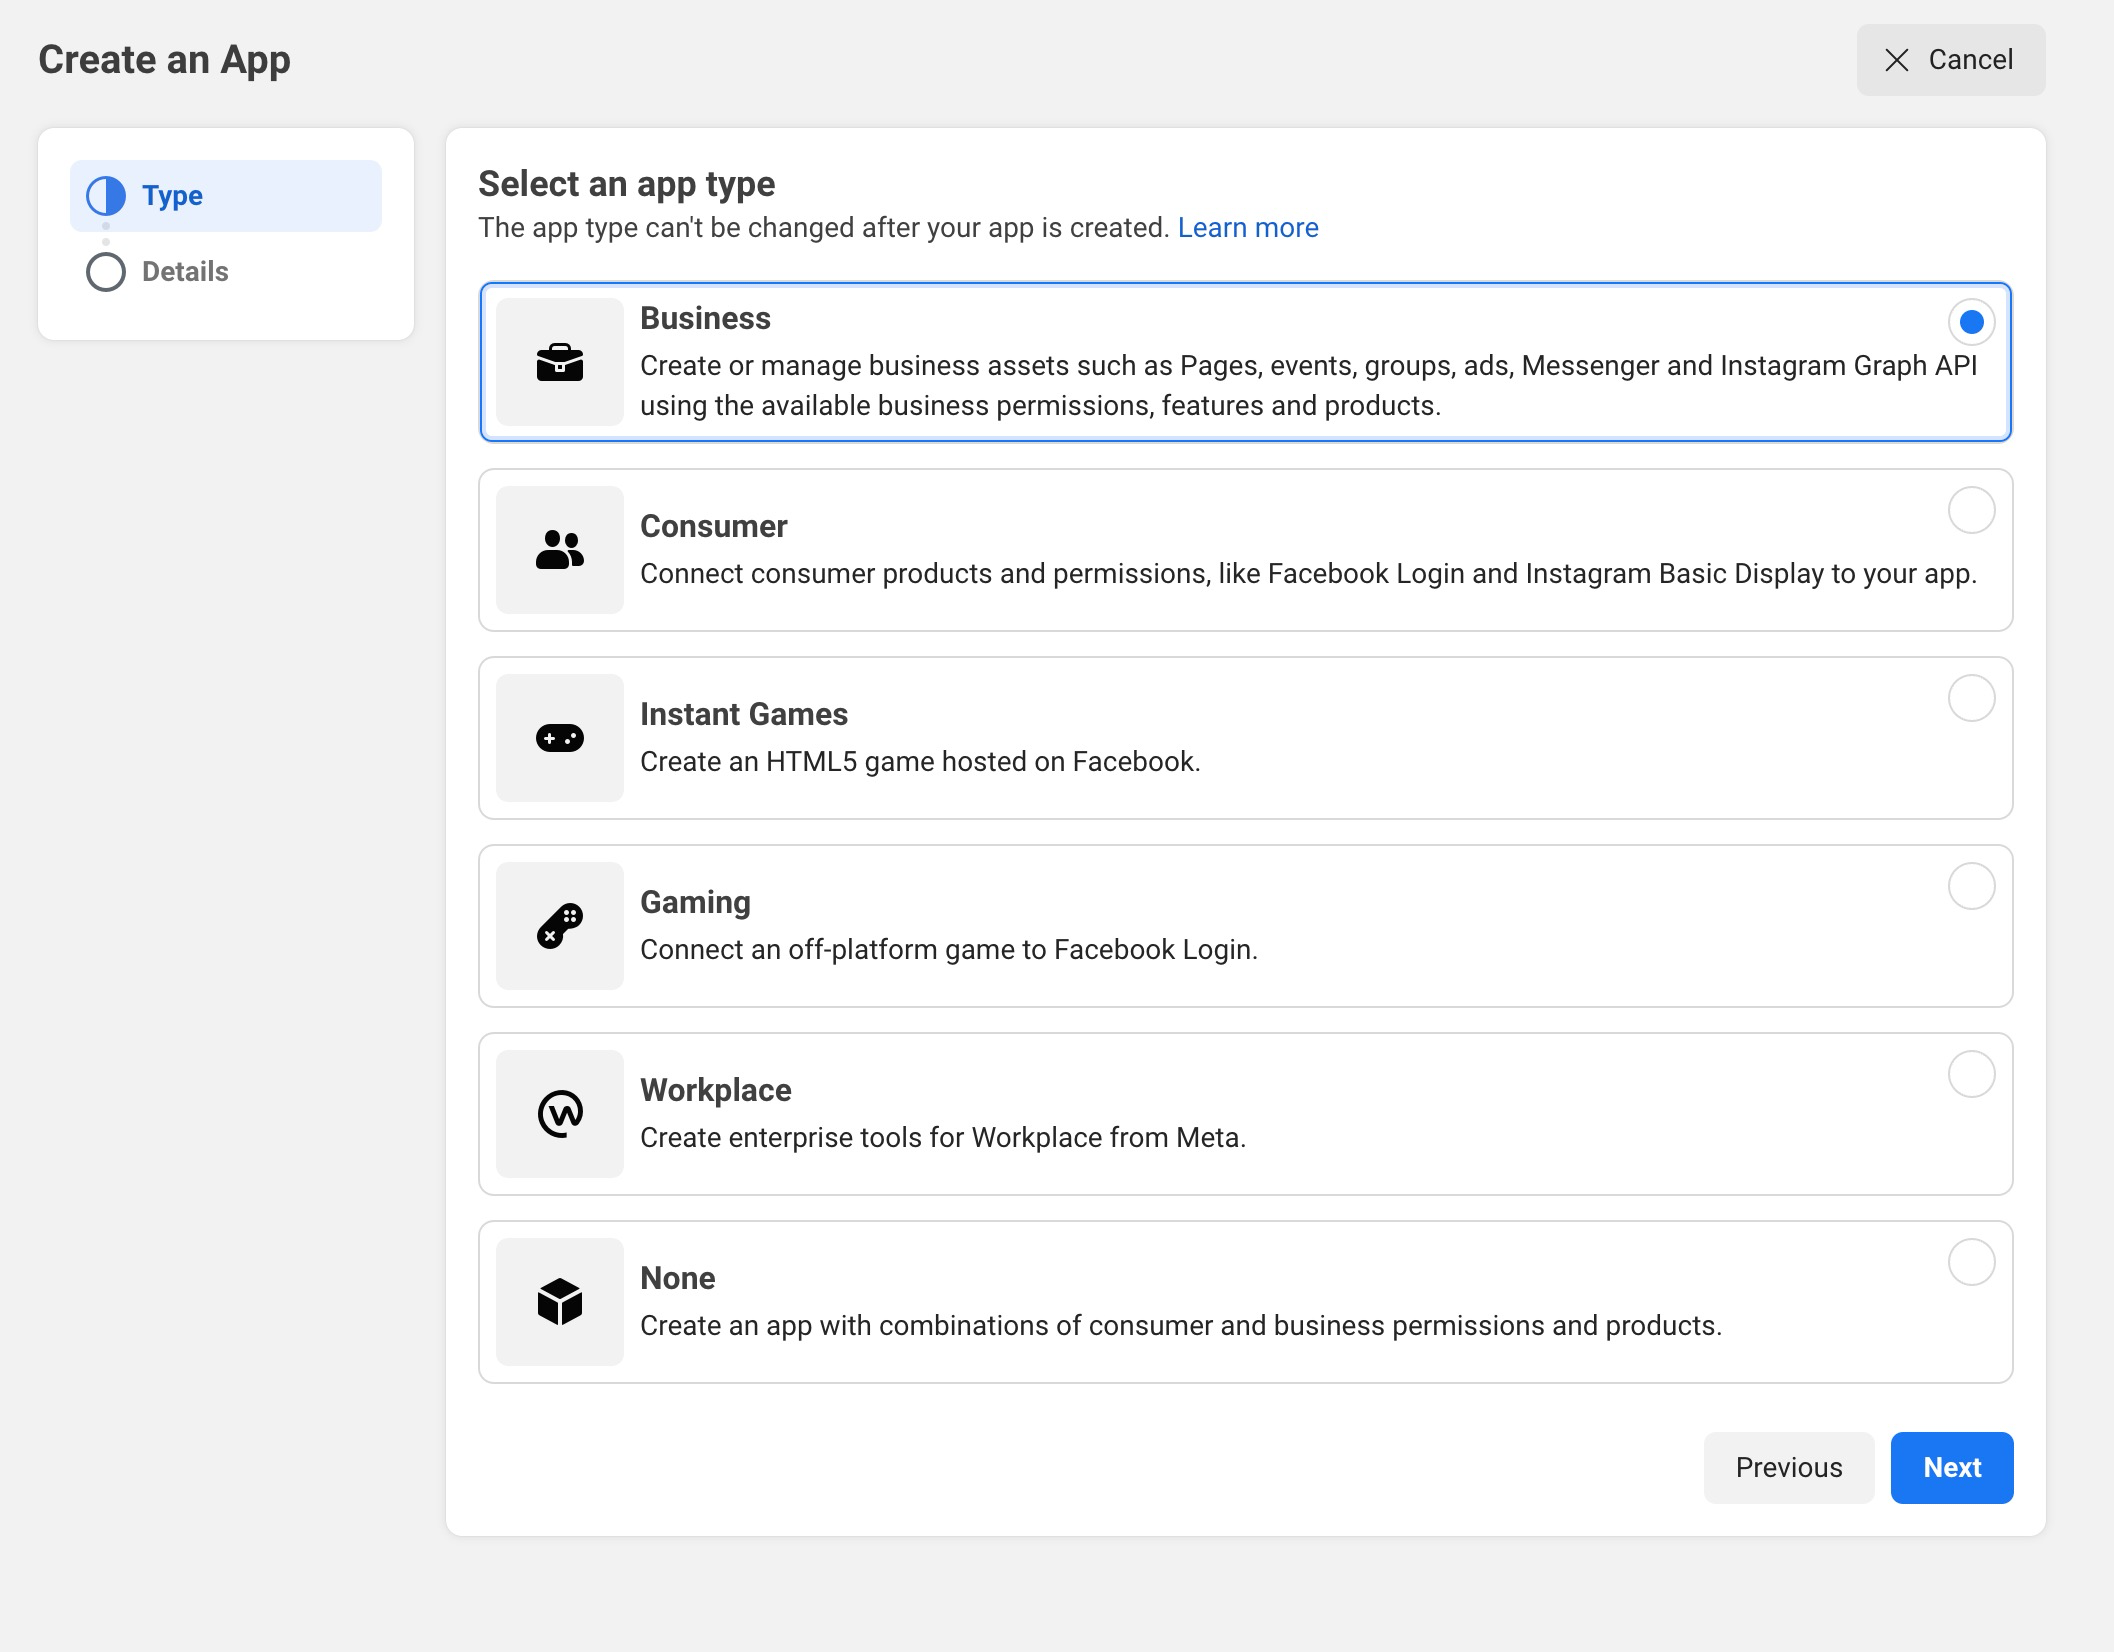
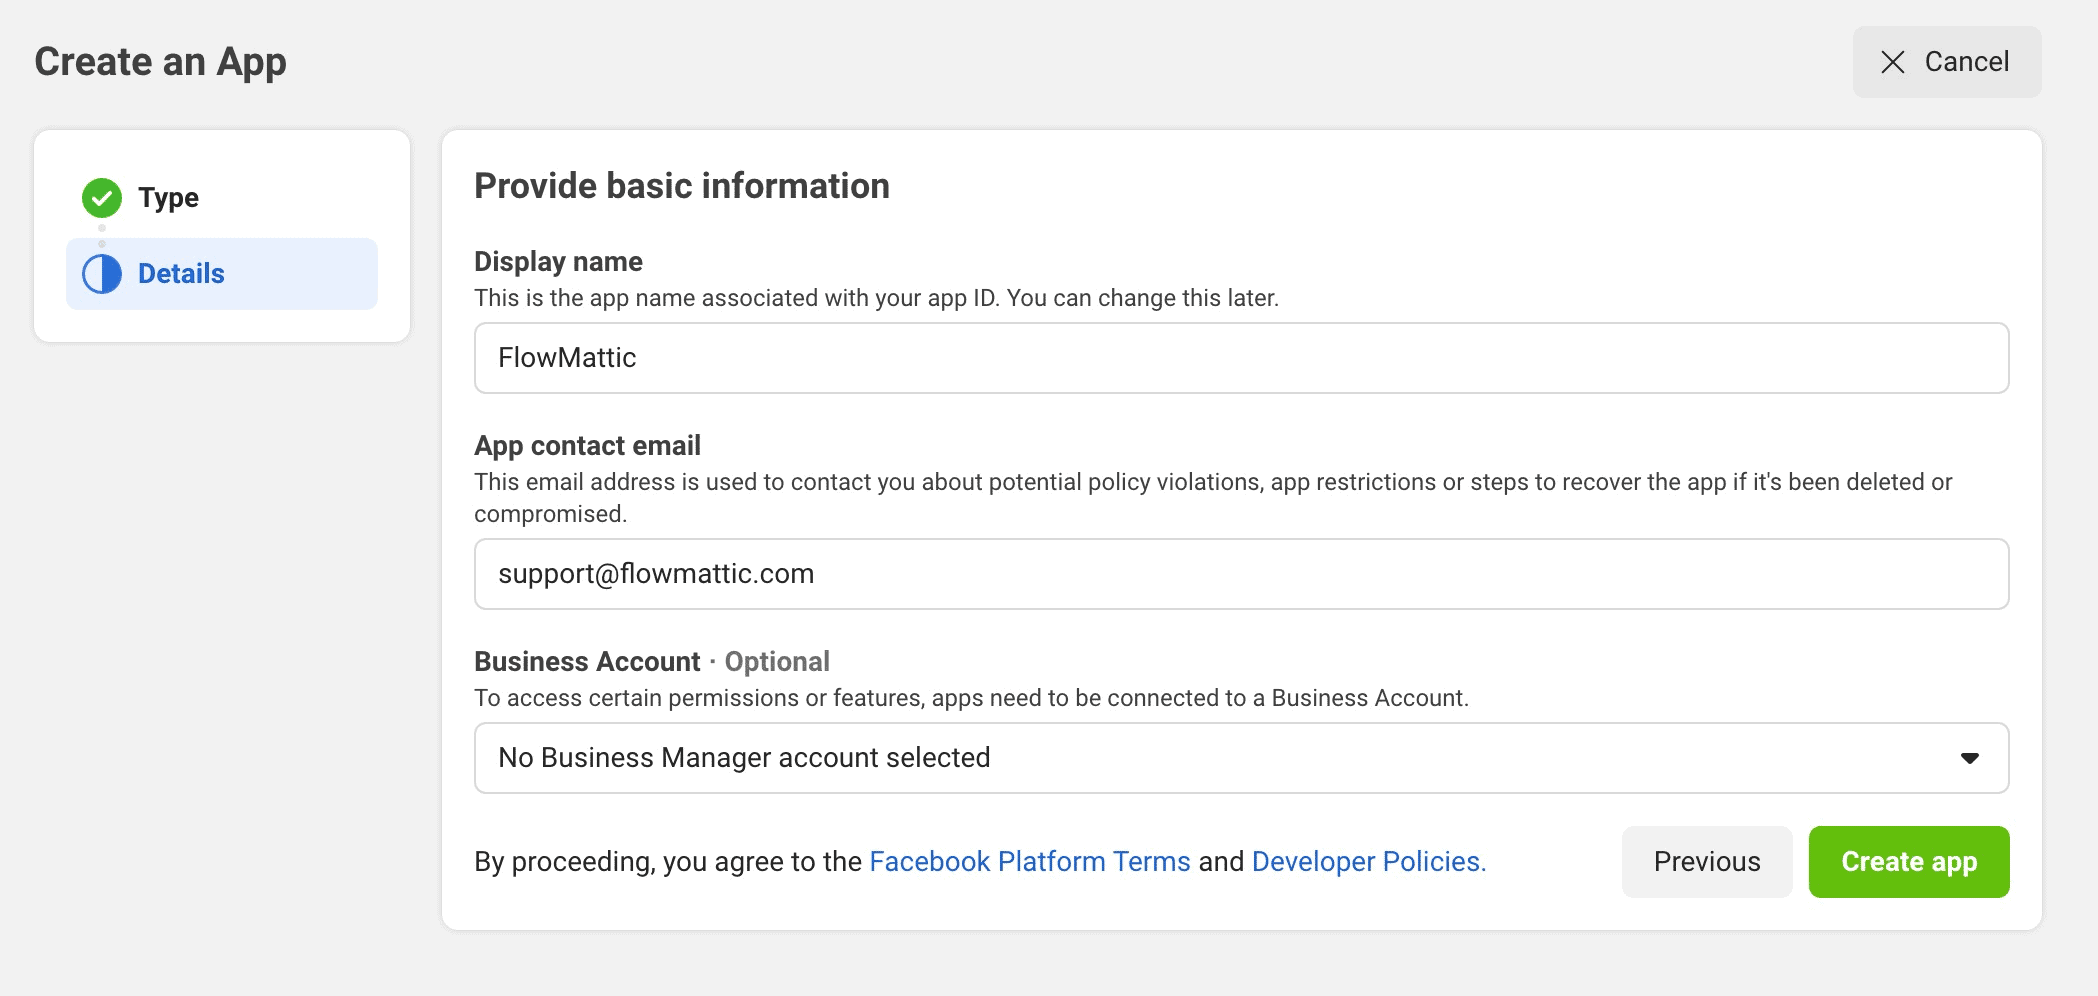
- On the next screen, fill the details - Display name, and email to be used to get notifications related to the app. If you already have a verified business profile, select it or just skip it for now. Once you feel all the details, click the Create App button to create an app.
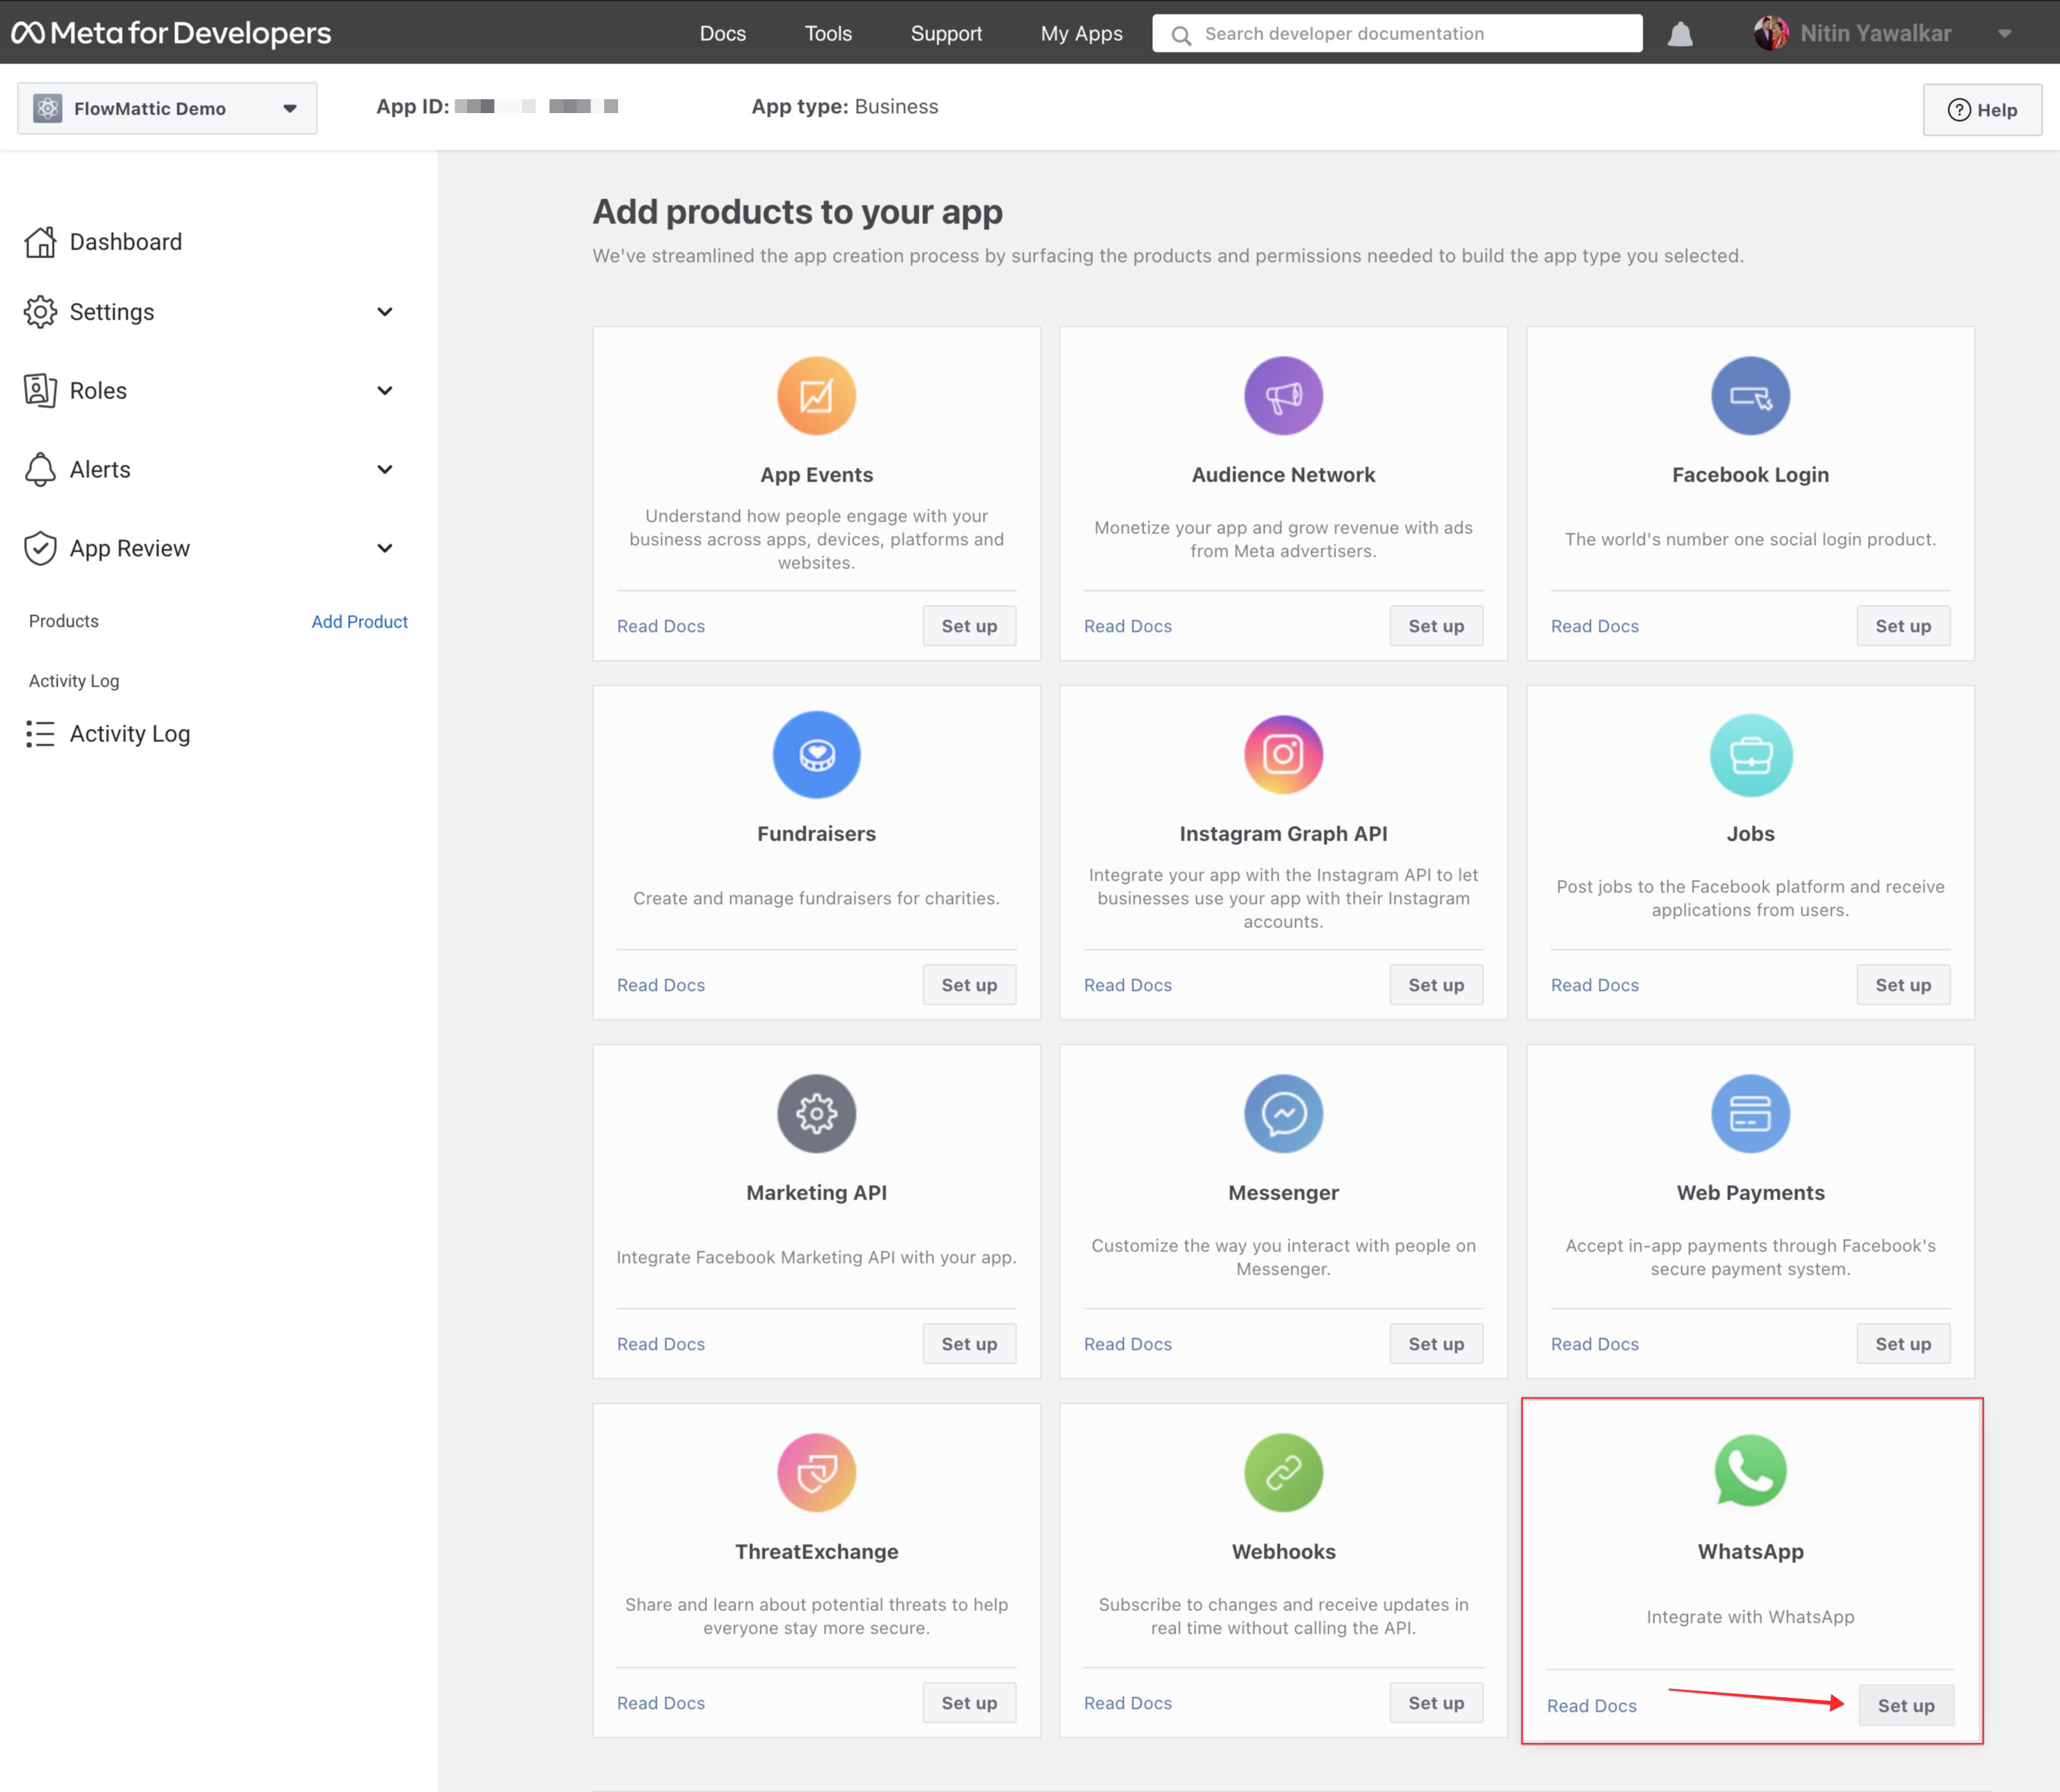
- Once the app is created, you'll be redirected to the page where you'll be asked to add products to your app. Choose WhatsApp and click the Setup button to set it up.
- WhatsApp getting started page will open. If you previsouly selected the Business, you won't see this step, if not, you'll be asked to select or create a Meta Business account. If you have one already, select the business from the dropdown or select Create a business account option. Click Continue.
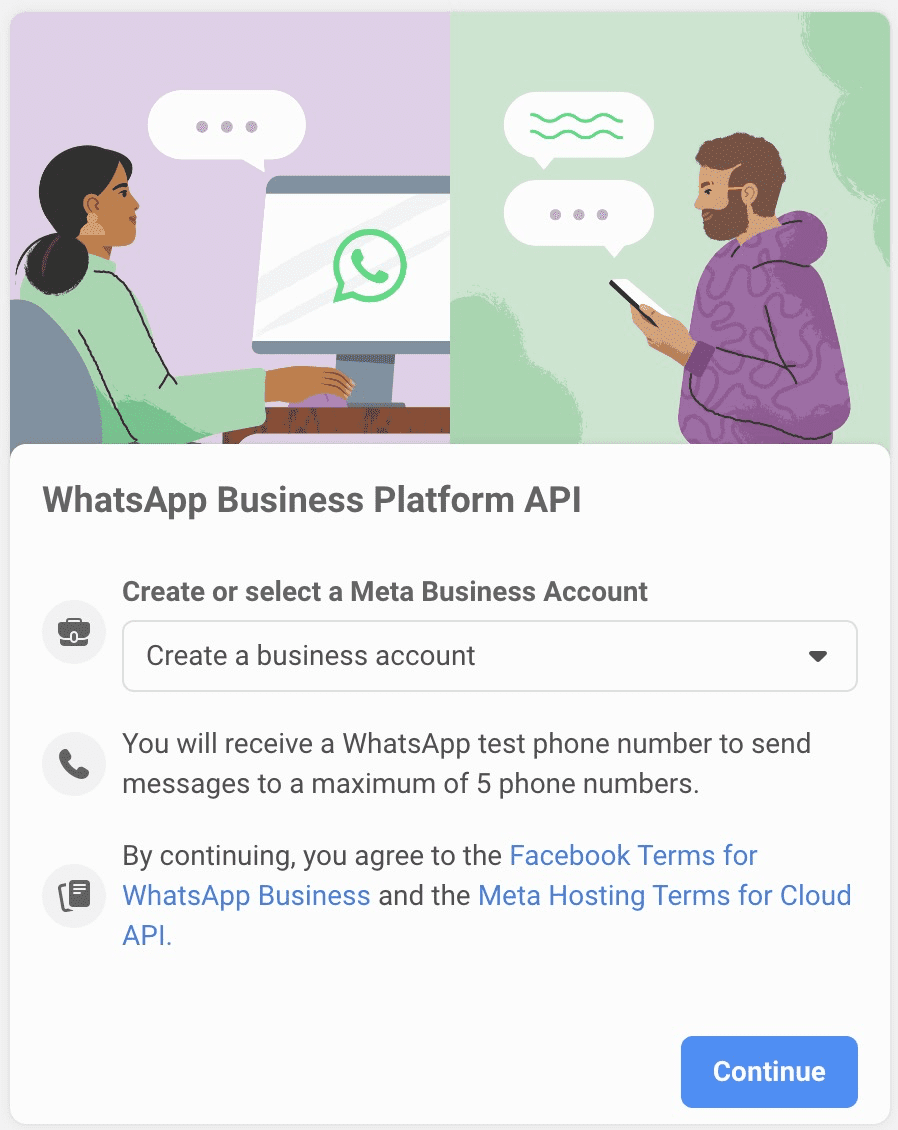
- Once you click the Continue button, a new Meta Business account will be created and you'll be redirected to the WhatsApp API Test page. Here, you will be able to see the following things -
- Temporary Access Token
- Your Phone Number to send WhatsApp notifications from
- Phone Number ID - It will be used in the API calls by FlowMattic
- WhatsApp Business Account ID - It will be used in the API calls by FlowMattic
Temporary Access Token is valid for 24 hours only. You'll need to reset it if you want to test the APIs after 24 hours. To keep your workflows running without the interuption, you'll need to have a Permanent Access Token. We will see how to create it later. - Click on the Add Phone Number button at the bottom of the screen and follow the on-screen instructions. You'll need to provide a Business Display name and Business WhatsApp number, which will be visible to your WhatsApp users. The number should not be in use for any WhatsApp account.
- After adding the phone number, try sending a test message to your preferred whatsapp number. You can set the whatsapp number in the To section. You need to select your new WhatsApp Business number from the dropdown for the From number and then note down the Phone Number ID and WhatsApp Business Account ID. We will need these two later while configuring the FlowMattic action.
- If you receive a WhatsApp message to your preferred number, you're all set to send the WhatsApp messages using FlowMattic as well. We need to get the Permanent Access Token only to keep running your workflows.
Getting Permanent Access Token
- Go to Meta Business Account settings, and select your business from the list.
- Once you land on the Business settings admin page, go to Users -> System Users
- Click on the Add button to add a new System User.
- A popup will open and ask you for the details as System Username and System User Role. Enter your preferred System Username and choose the User role as Admin.

- Click Create System User button. A new system user will be created.
- While you're in the System Users settings page, click the button Add Assets.
- From the popup, select the Apps as Asset Type, under Select Assets, choose the App you just created and under the App permissions choose Full Control. See below image for detailed info -
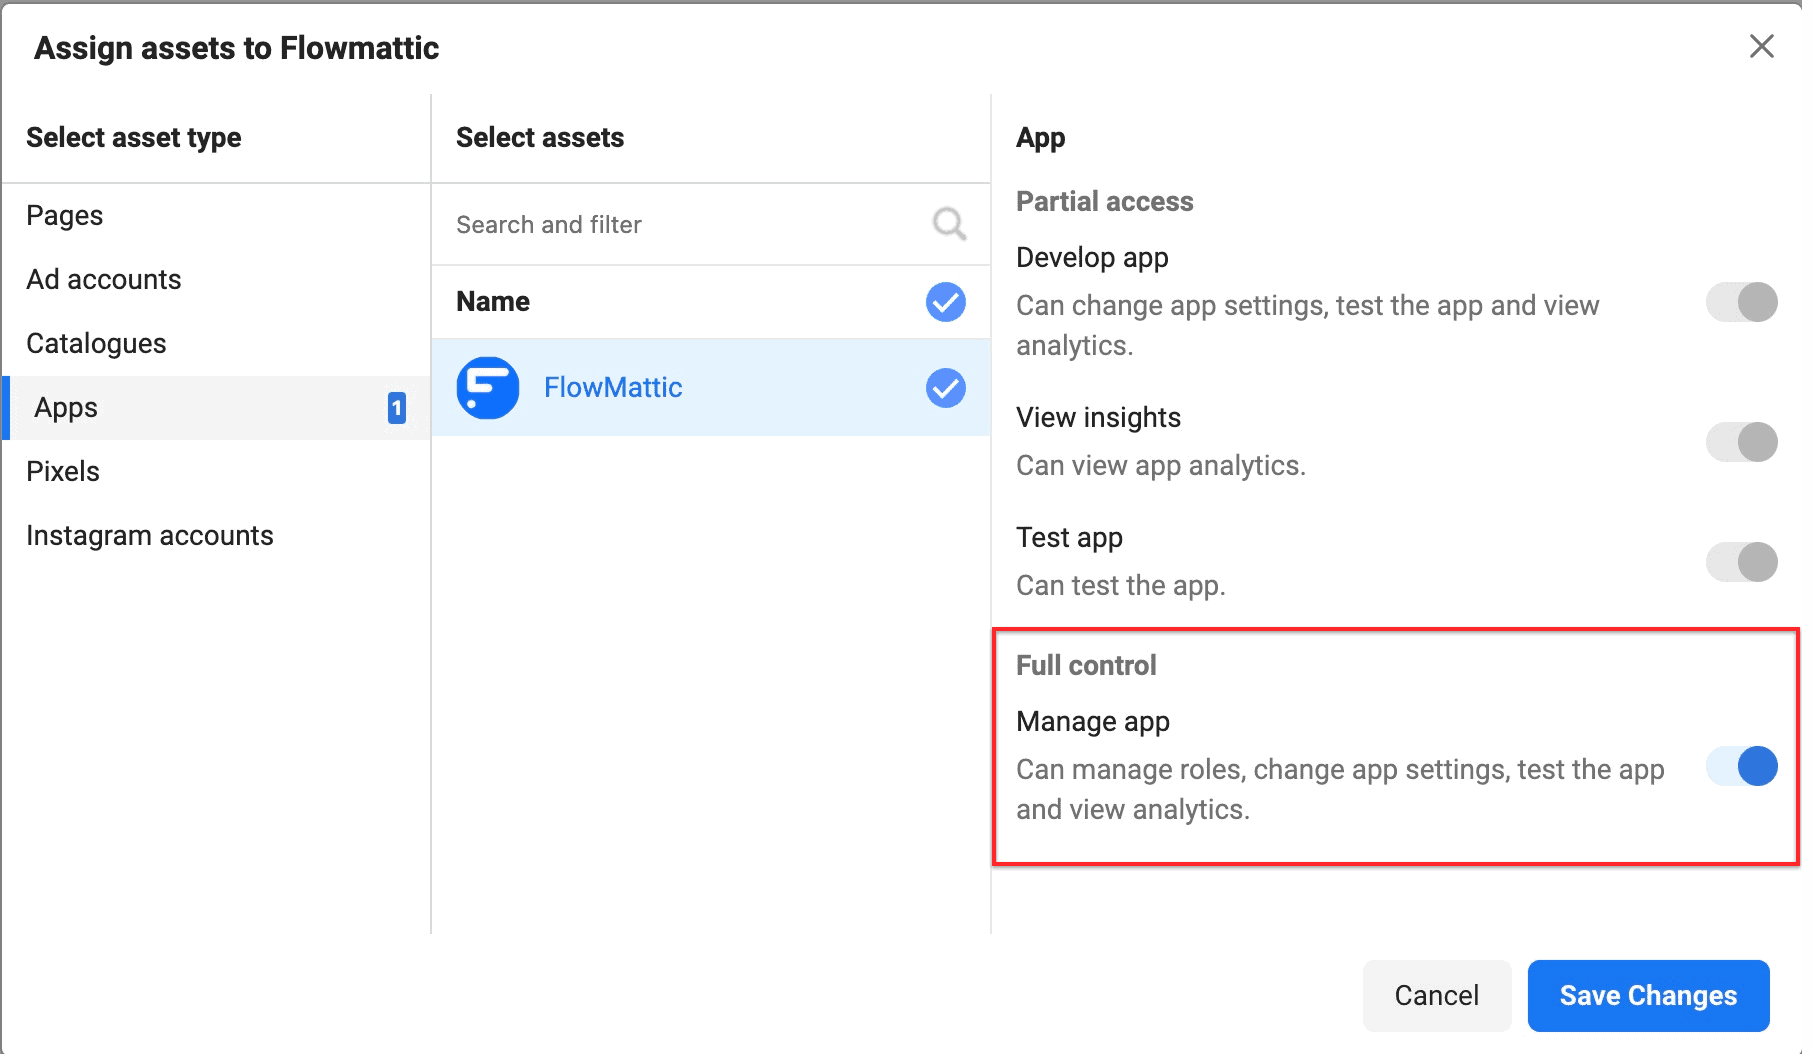
- Click Save Changes and an asset will be added to the System user. Now, we are ready to generate our Permanent Access Token.
- Locate and click the button Generate Access Token. This will open up a popup and ask you to select the App you want to generate the token for.
- Select the App you created for WhatsApp. You will see a list of available permissions. Choose the following permissions only and create the Generate Token button.
- whatsapp_business_messaging
- whatsapp_business_management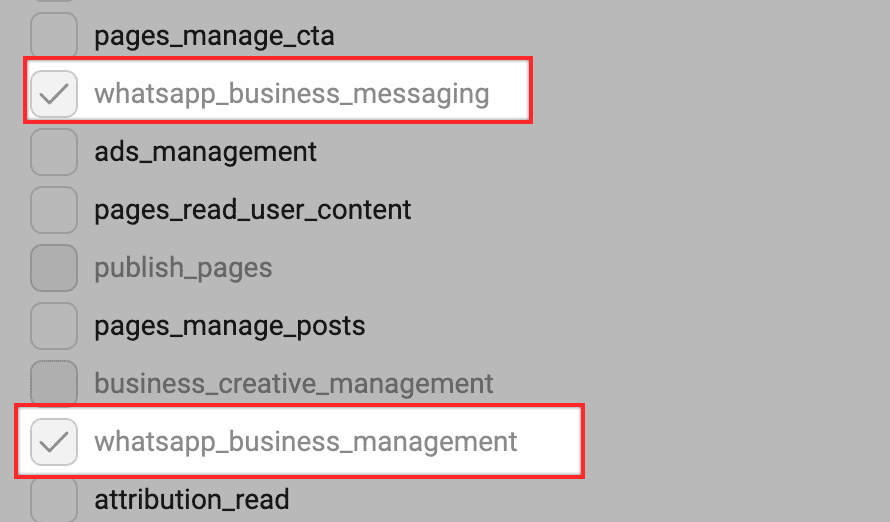
- Your token will be created and displayed for once only, so you need to copy it and store it somewhere before you close the popup. Once you close the popup, you will not be able to see the token unless you create a new one.
Using WhatsApp Cloud API in FlowMattic
In order to use the WhatsApp Clouser API integration inside FlowMattic, you need to have the following things ready. We already have them all from the above steps :)
- WhatsApp Access Token ( Either Temporary or Permanent )
- Phone Number ID
- WhatsApp Business Account ID
- Now go and install the WhatsApp Cloud API integration from your FlowMattic -> Integrations admin page.
- Create a new workflow and set up your trigger step to get the data in your workflow. E.g Contact Form 7 with the user's mobile number field.
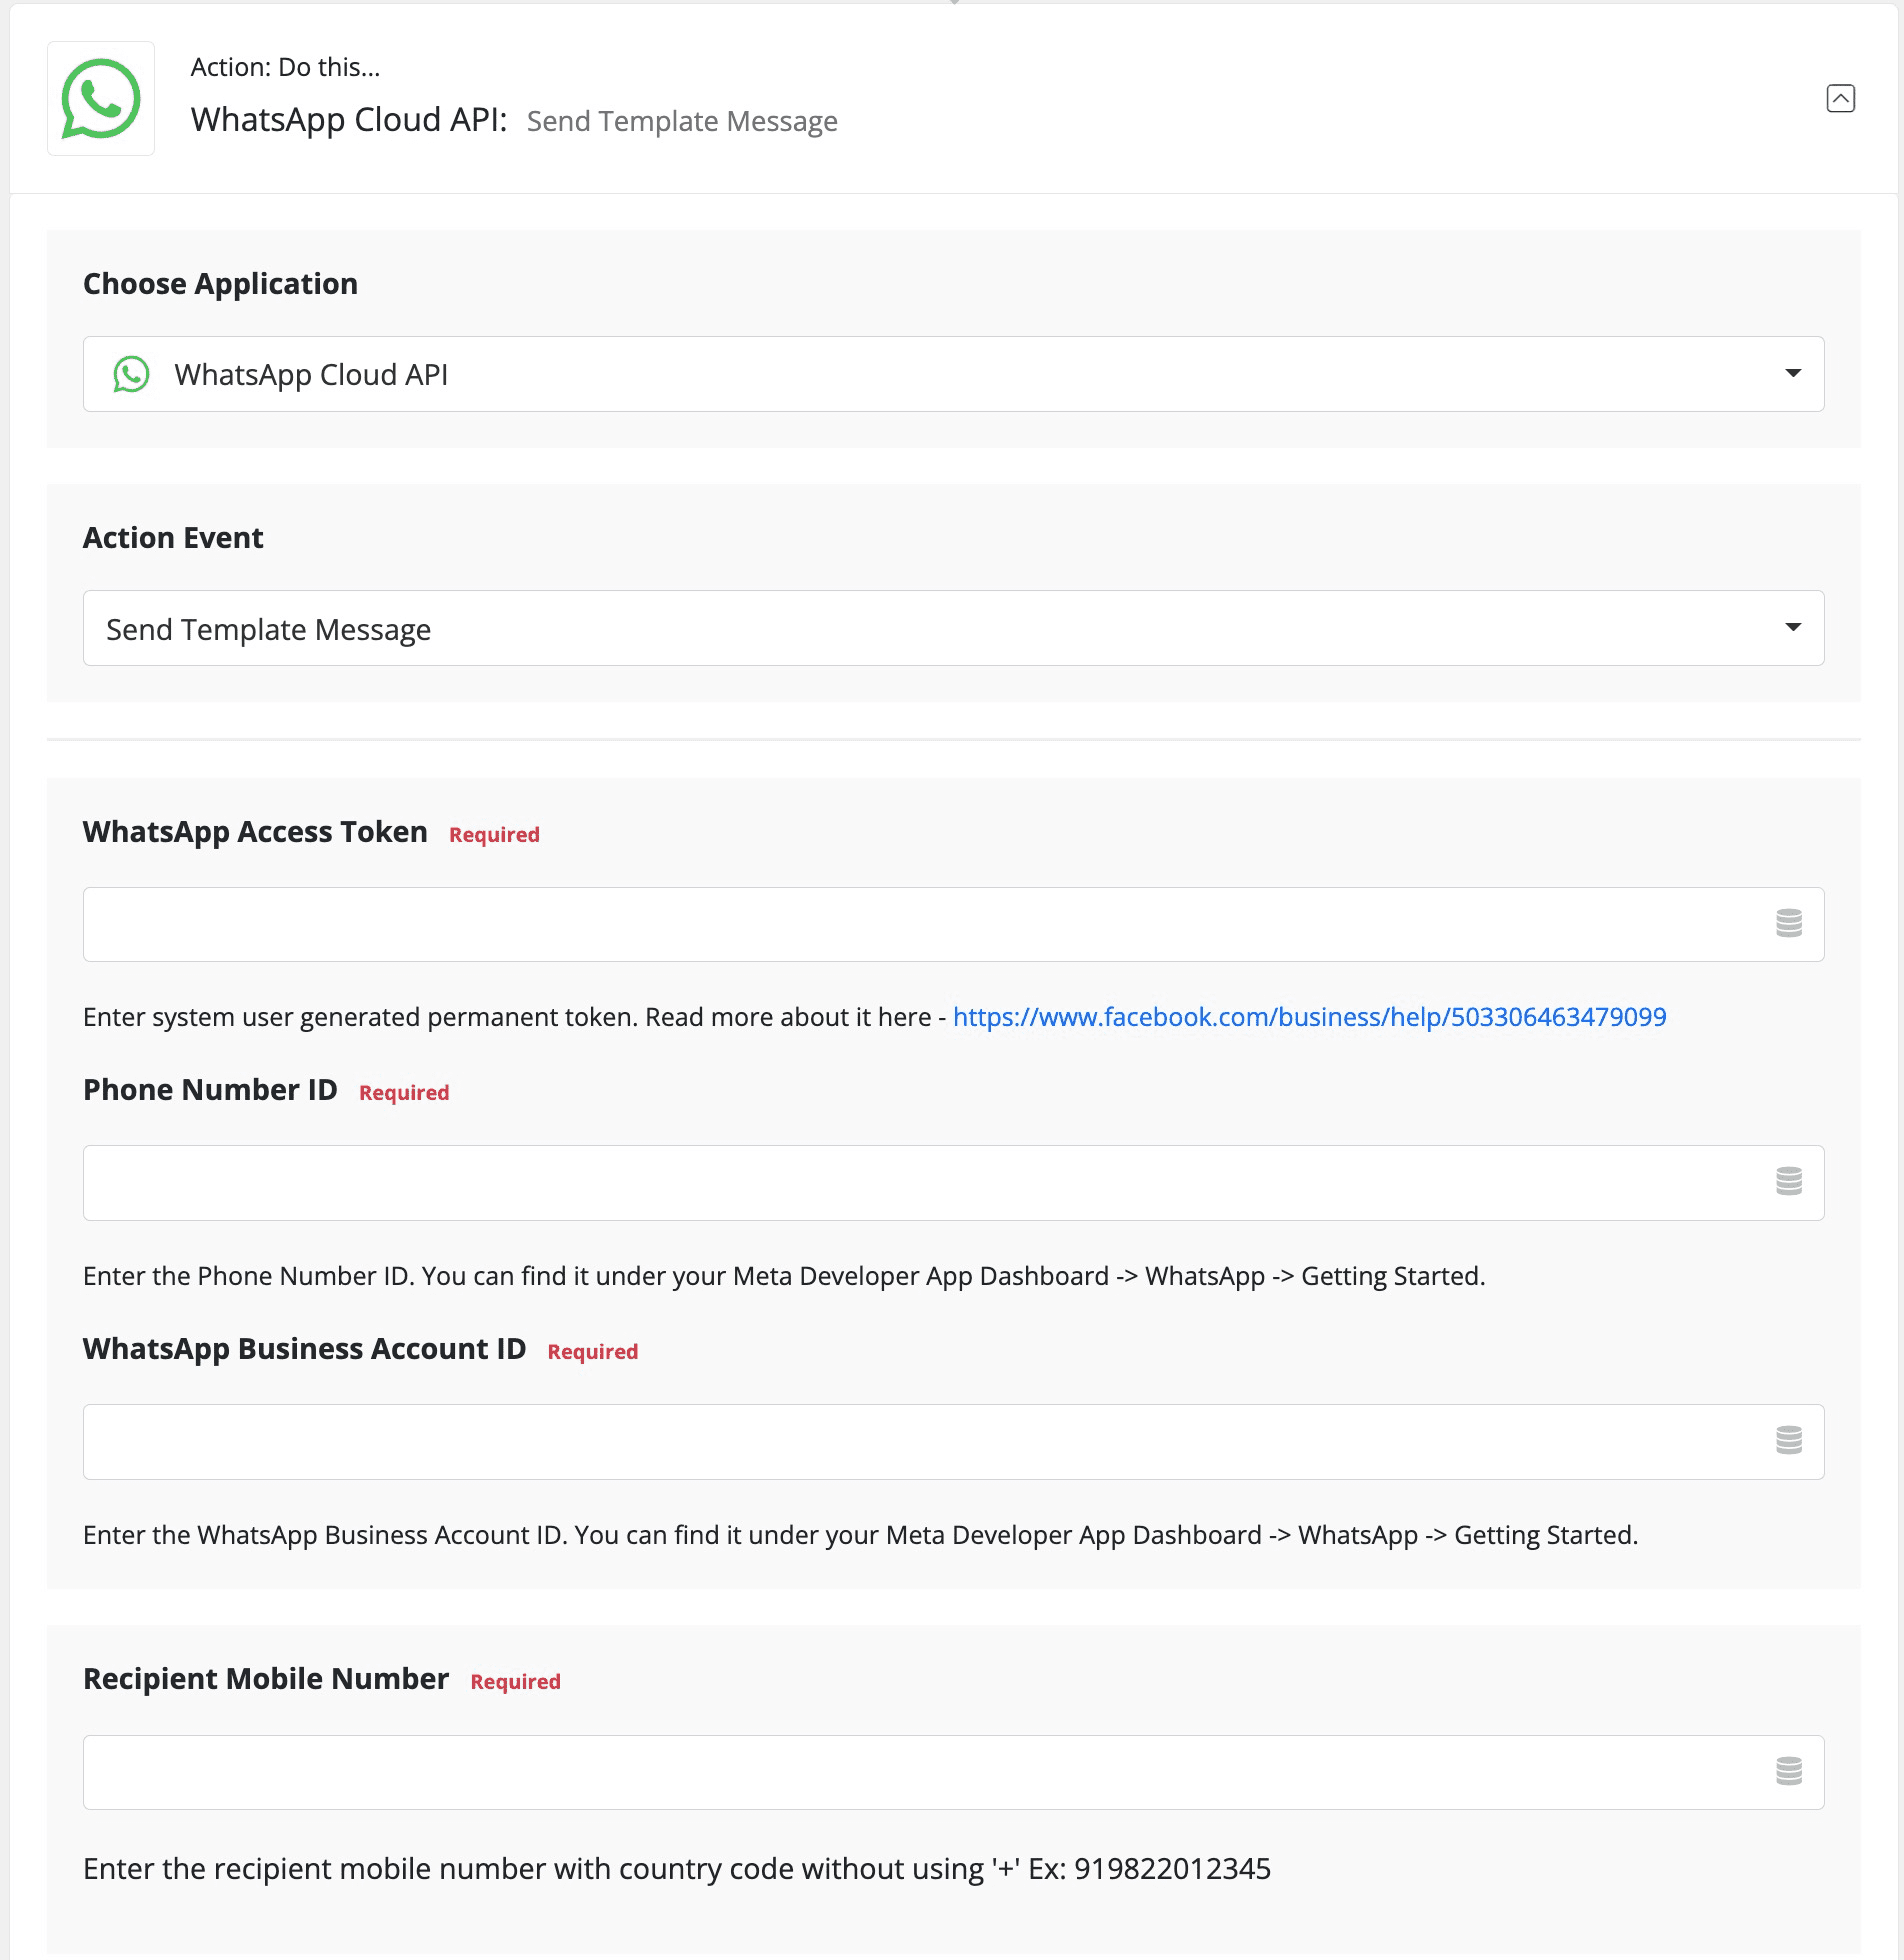
- Add an action step and select the WhatsApp Cloud API. You will be asked to provide the above required details as soon you select the app and the action step is created.
- Fill up the information of the access token, phone number and account ID etc.
- Select the phone number from your trigger step for the Recipient Mobile Number.
- Save the workflow once, so the settings will be available when you test the action.
- Now, choose how you want to send the message to users. You can select any option from the available actions -
-
Send Template Message
-
Send Text Message
-
Send Image Message
-
Send Video Message
-
Send Document Message
-
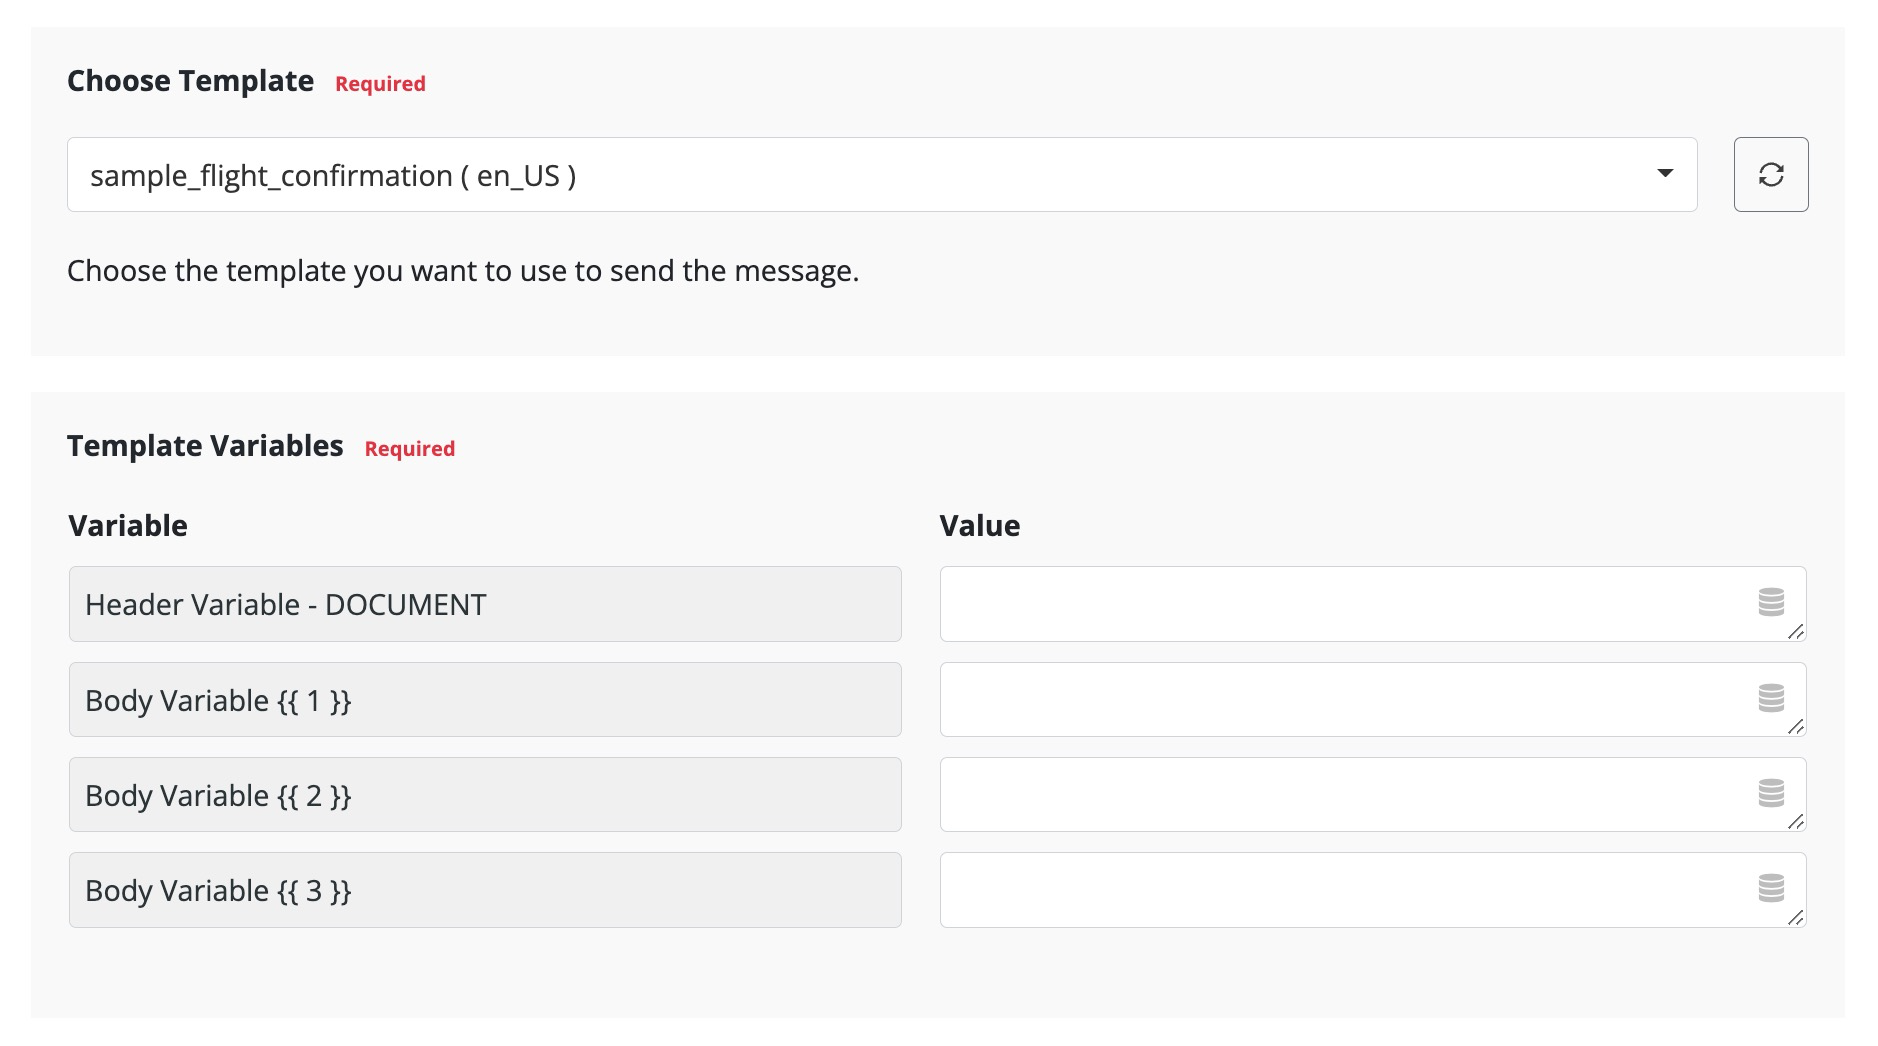
- For template messages, you need to pull the templates first, so locate the option for templates and click the refresh button to retrieve the templates.
- Once the templates are retrieved, you can choose any template you want to send to the user. If the template uses the dynamic variables, you'll see a list of the variables available for the template. You need to fill the variable values. You can use dynamic tags from your trigger step or enter static values as well.
- For the other message types - Text, Image, Video, and Document, you will need to provide the corresponding value with the appropriate type.
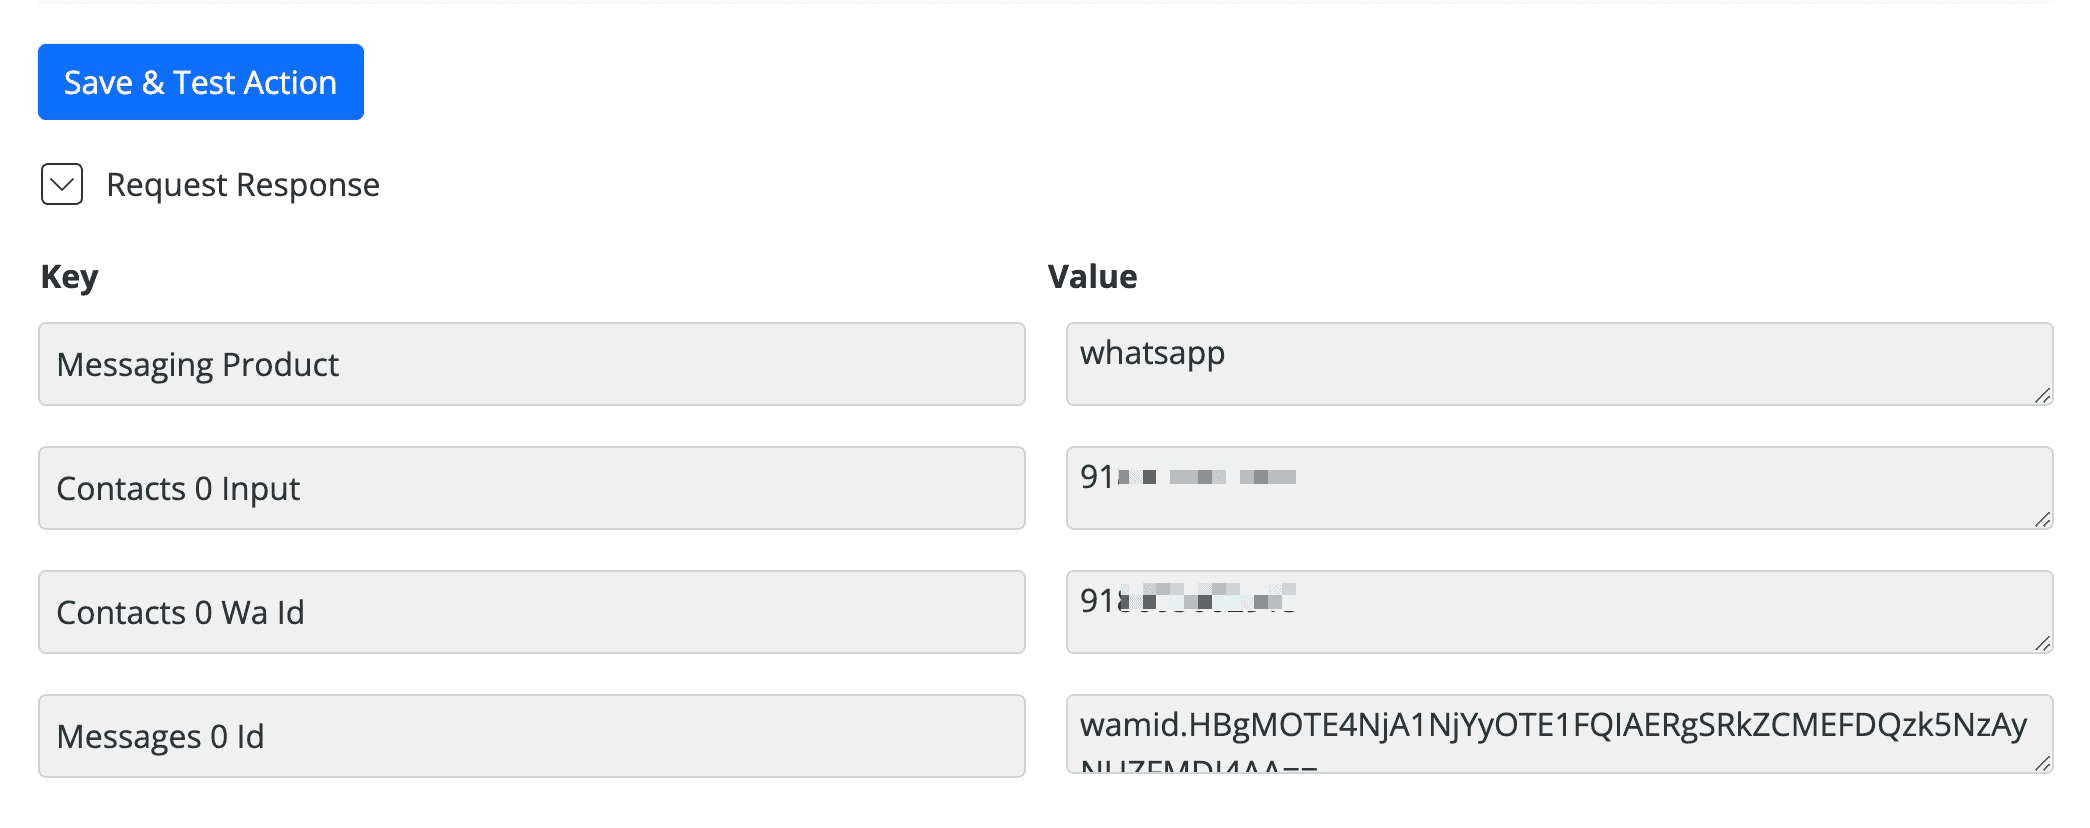
- Once you're done with the settings, click on the Save and Test Action button. You'll instantly receive a message on your WhatsApp as per your preferences. If the message sending was successful, you'll receive the response as following -
FAQs
1. What is WhatsApp Cloud API?
WhatsApp Cloud API is a Facebook-hosted platform of WhatsApp Business API, which helps you to send and receive messages. The Cloud API allows you to implement WhatsApp Business APIs without the cost of hosting of your own servers and also allows you to more easily scale your business messaging.
2. Why should one use the WhatsApp Cloud API with FlowMattic instead of other providers?
The simple answer to this question would be - cut your costs. Other WhatsApp solution provides uses the same API, however, since they are hosting it on their servers, you need to pay additional to use it. With FlowMattic, you don't need to relay on the 3rd party providers and pay monthly.
3. How does the pricing work?
The pricing for the messages is being handled by the Facebook ( Meta ) itself, and we don't have any control over it. You'll be paying to Meta for whatever your usage will be. You can read more about the pricing structure here - https://developers.facebook.com/docs/whatsapp/pricing
4. Can I connect existing number of do I need a new one?
You can connect your existing number as well, just make sure it is not connected to any WhatsApp account ( personal or business ) before using it for the Cloud API.